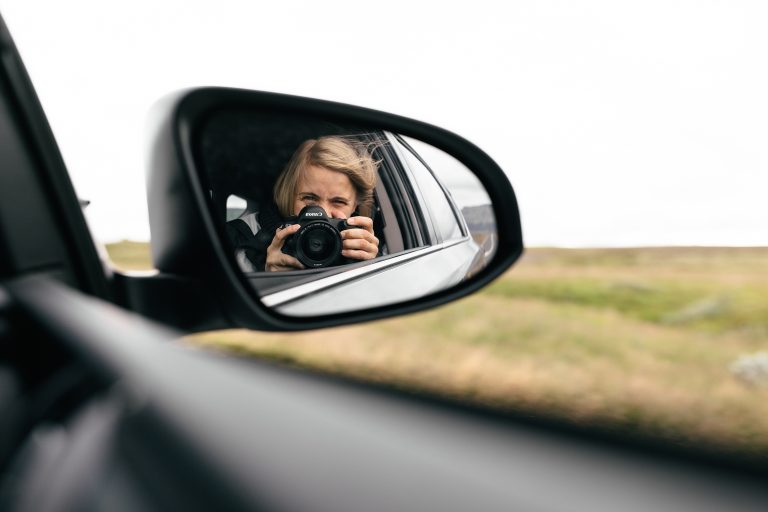
The Full Scoop on Traveling with Camera Equipment

This one is for the photographers in the house (or anyone traveling with camera equipment)! If it isn’t obvious, I bring quite a bit of gear with me every time I travel. By this point, I have my gear packing list and the security checkpoints down to a science. I get a lot of questions about how to travel with camera equipment efficiently, so as I prep for Colorado this weekend I thought I would share the whole scoop.
In this post, I’m going to cover which cameras and lenses I take with me, what I pack them in, how I go through security without holding up the line, my backup process, and everything else I’ve learned about flying with camera equipment.
Always keep everything in your carry on
The absolute, number one, biggest rule of traveling with camera equipment is to always keep it with you in the airport. Do not put any of your gear or memory cards in your checked bag! You just never know how your suitcase will be treated or if it will get lost, so you want to make sure you are the one handling it the entire time!
The only exception to this is if you are traveling with tripods. Most tripods can’t be carried on because of their size. If you need to bring one, I would invest in a padded tripod bag to transport it.
Use a backpack
The best decision I’ve ever made was ordering this backpack on Amazon. It’s only 55 bucks and has lasted me for over 2 years now with no signs of wearing out anytime soon. When I travel, I am able to safely pack all of my gear in it. Typically, I make this my personal item that goes under the seat in front of me and pack all of my clothes in a carry on suitcase for the overhead bin.

If you aren’t using a gear bag, make sure your camera and lenses are protected. The easiest way to do this is to wrap them up in clothing in your suitcase!
If you are using a gear bag that won’t fit under the seat in front of you, make sure to arrive early enough to avoid the risk of having your bag gate checked.
Efficiently going through security
Going through security can be overwhelming with camera equipment. Here’s the general rule of thumb: if you have any tech that’s bigger than your cell phone, it needs to come out of your bag and get put in a bin. This includes DSLRs, lenses, drones, and laptops. In my experience, it does not include GoPros or point-and-shoot cameras.
This is where having all your gear in a backpack majorly comes in handy! Going through security with everything in one easy-to-open bag is significantly easier than pulling things out of your suitcase. A pro tip here is to slide your liquids bag in the front pocket – that way you never even have to open your carry on suitcase!
People often ask if memory cards can go through the scanners at security. Back in the day, film couldn’t go through without being damaged, but these days your cards will be totally fine. I always put mine through and nothing has ever been damaged.
Back everything up!
Before you head home from your trip, it’s a good idea to copy all your images to your laptop or an external hard drive. I recommend this just in case something would happen like your camera bag is stolen or a card corrupts.
My backup process looks like this…
- I shoot on a dual card camera, so all images are saved on a CF and SD card as I shoot.
- Every night of the trip, I copy all of the RAW files to a portable external hard drive.
- When I get home, I copy all the RAW files to two separate desktop hard drives.
- Once the photos and videos are edited, I format the memory cards and delete the RAW footage off my portable external.
- Lastly, I copy the edited photos and videos to my two desktop hard drives.
When it’s all said and done, all the RAWs and edited footage are saved in 2 places.
My process is probably excessive and having that intense of a backup process might not be worth it to you. I recommend having everything in 2 places until you get home, but if you can’t do this, it will likely be totally fine. I would just transfer the images from your memory card to your computer as soon as you get home.
Don’t bring more than you need!
When it comes to camera equipment, it’s important to remember that you don’t need to bring every piece of gear you own. Some lenses will just be extra weight on your back in the airport, so only pack the gear you will actually use!
I will share my camera equipment breakdown in a second, but here is my general advice… Depending on what you have, pack one camera body that takes good photos and video clips, one wide lens, and one tight lens. If you have a GoPro or a drone, grab those as well. (First make sure drones are legal where you are going!)
This is what I typically pack for my trips…
- Canon 5d Mark IV camera body
- 35mm lens has
- 70-200mm lens
- Sony RX 100 Mark 6 (my vlogging camera)
- GoPro Hero 7 Black – I only bring this if I am going somewhere where I will want underwater footage.
- DJI Mavic 2 Zoom Drone – Again, I only pack this if drone flying is legal and practical in my final destination.
- Extra Batteries
- Chargers
- Extra memory cards
I guess I can’t preach not bringing more than you need. 😉 That list looks long, but I promise it all fits in my backpack and I use all of it. I also slide my laptop and a card reader in my backpack so I can look at photos during the trip.

If I am tight on space (like when I fly Frontier and all I have is a backpack for everything), I just bring my Sony for video and take photos with my phone.
Alright folks! That’s all I have for you today! I hope this was helpful for the next time you have to fly with camera equipment. 🙂
Pin it for later